Custom Builds
When we started this project we used to look up cabinets, furniture, and the like at IKEA and similar stores, dreaming of how this whole project would come together. We took measurement of things and matched colours and styles. As the project progressed though and we faced the reality of very limited space and odd dimensions, so we took matters into our own hands. We switched from fitting our space to products and created items instead which fit to our space. Here are a few of the items we are most proud of, created by hand, by Phil and I.
The Couch
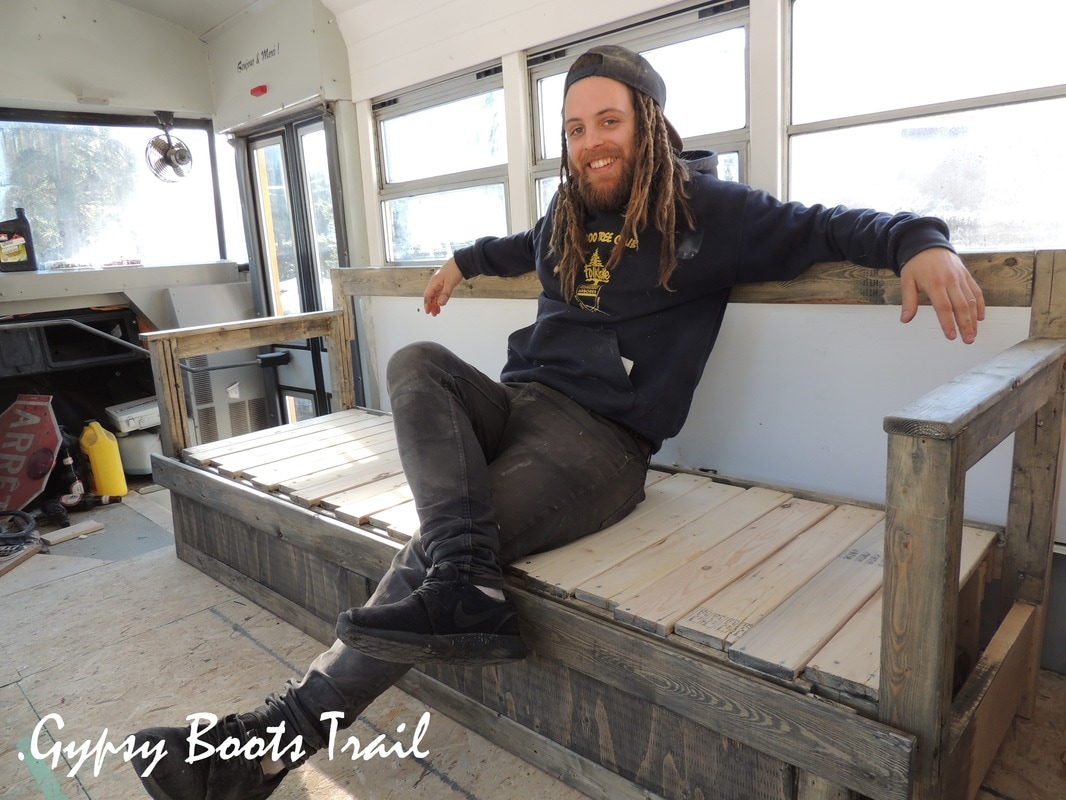
We found the template for building this couch early on and decided it was perfect for the bus. It was free, created on Sketch Up and advertised as a simple build. When it came time to actually build it however, the fact that the creator of the template had never actually built the couch became overly apparent. What a nightmare the whole thing was!! On top of bad instructions, measurements, and a ton of spelling errors, we also changed the dimensions to better suit our space and the math for that alone was hard enough for the two of us. Phil spent a total of 4 days (full days) working on this beauty; building, rebuilding, adjusting, cursing, and kicking, until it all came together, just how we had imagined. Never, will I take for granted a functional piece of furniture again!
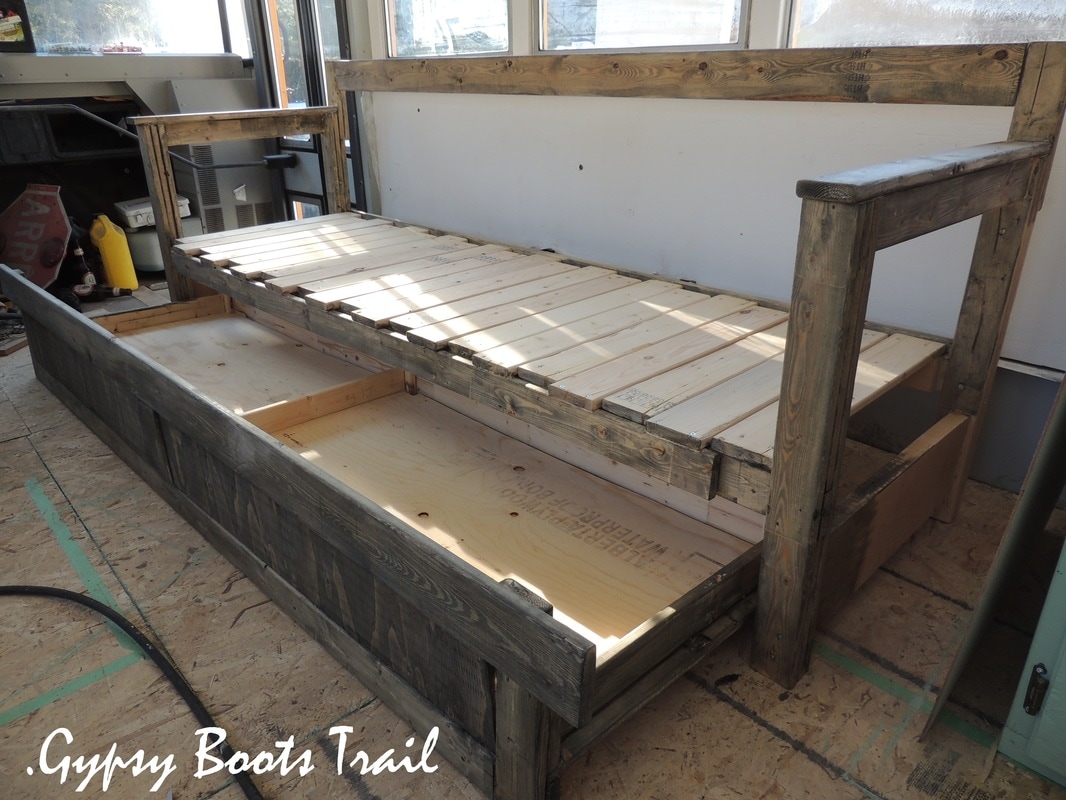
Under the couch we have two deep, but low, drawers where we plan to house blankets, sheets and towels.
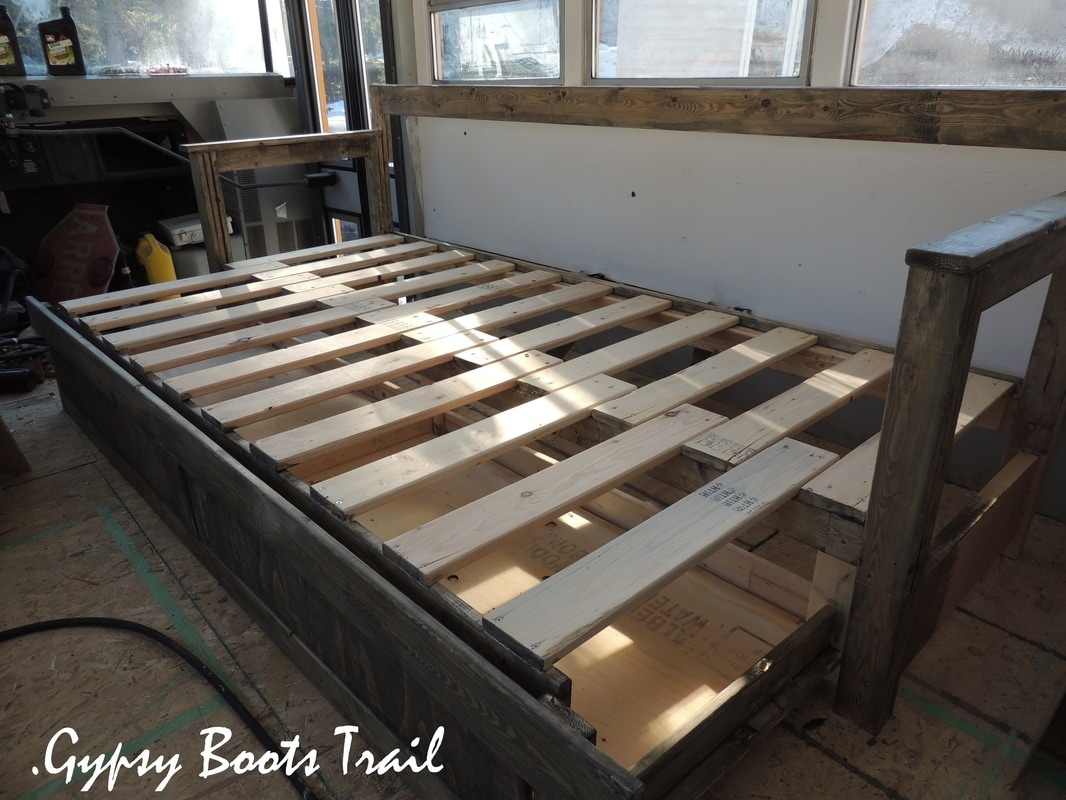
As well, the couch pulls out into a bed big enough to sleep two! Two people who know each other quite well, but still two. Finally while travelling we have the opportunity to have people over! This was never an option when living in my minivan.
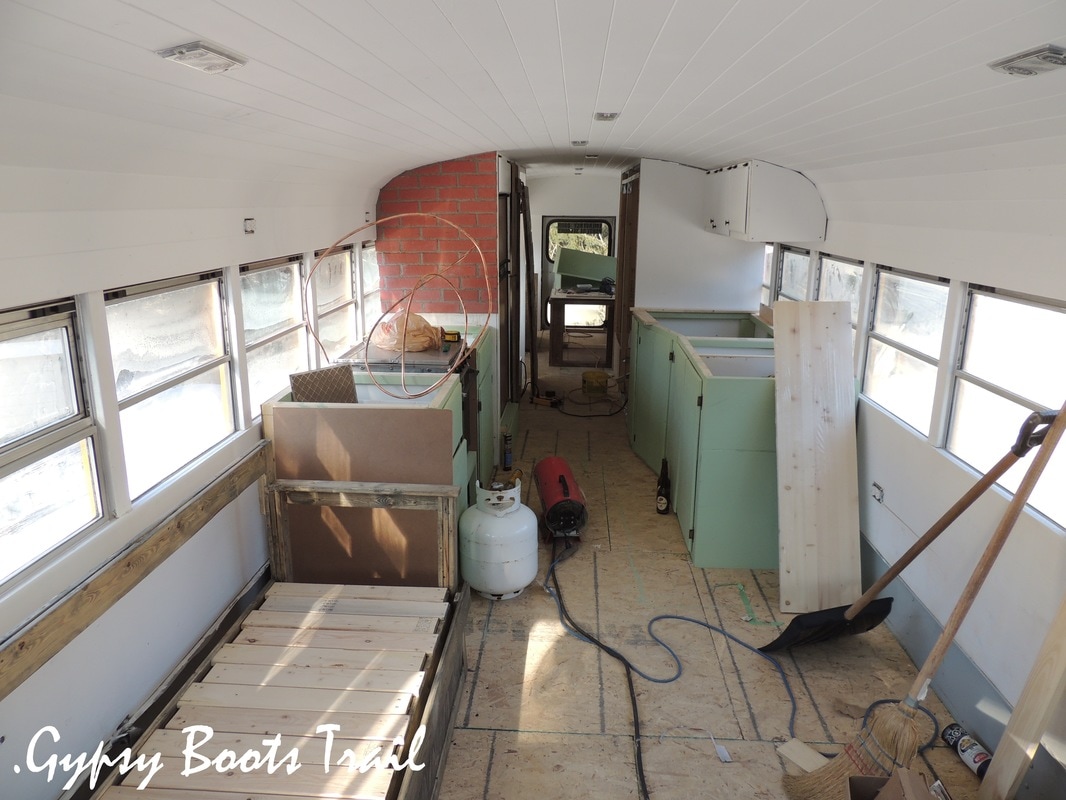
Kitchen Cabinets
I discussed in a previous post how the kitchen cabinets were put together, but here is a loo at them completed.
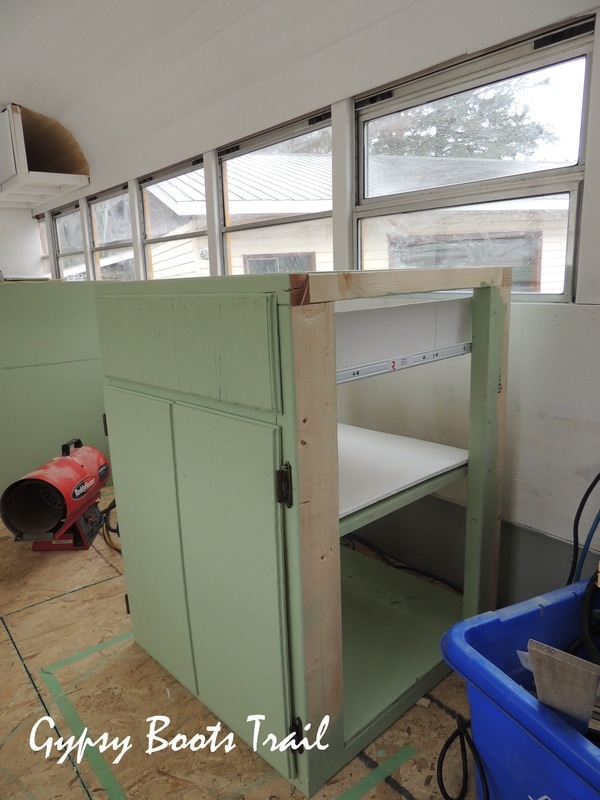 | 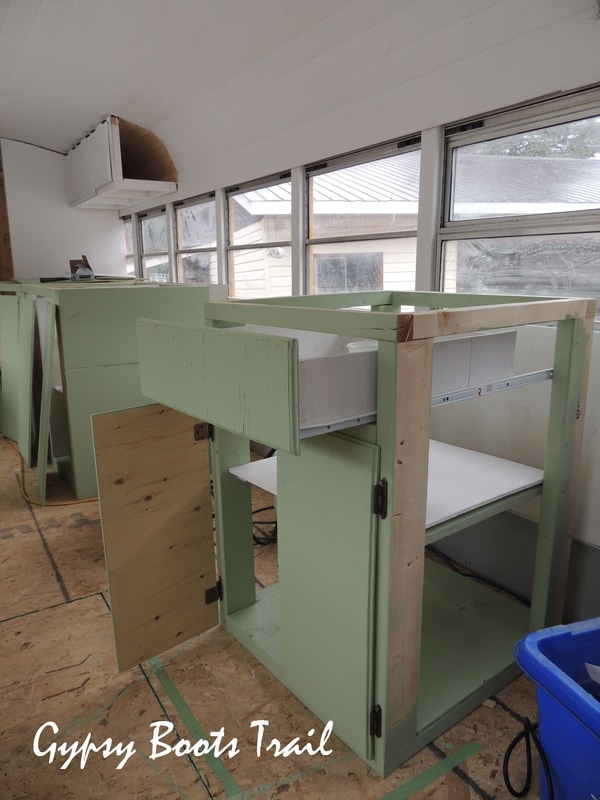 |
We've created ample space for everything we would need to store in the kitchen, plus hopefully extra space for all the things we are forgetting we will need to store, in our little home on the road. I know they don't look perfect or professional, but they are definitely something we can be proud of, having made them entirely with our own two (four) hands.
 | 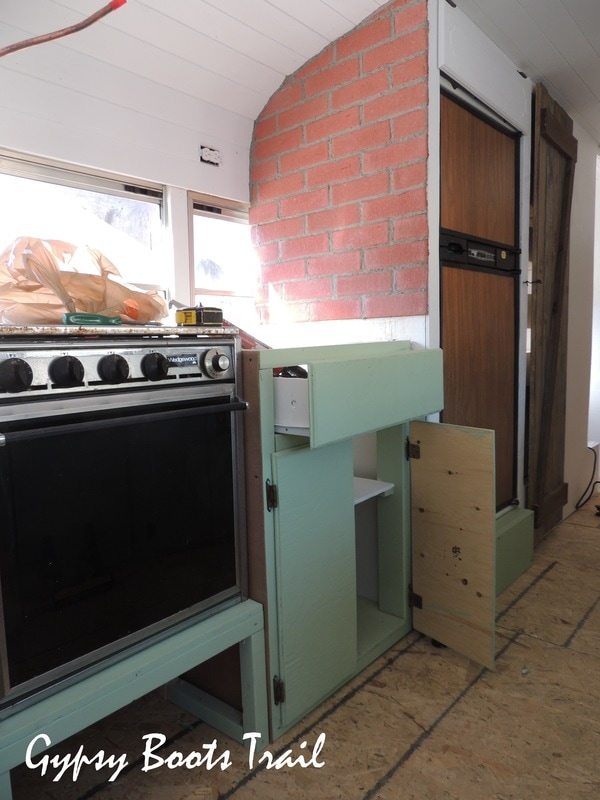 |
The Brick Wall
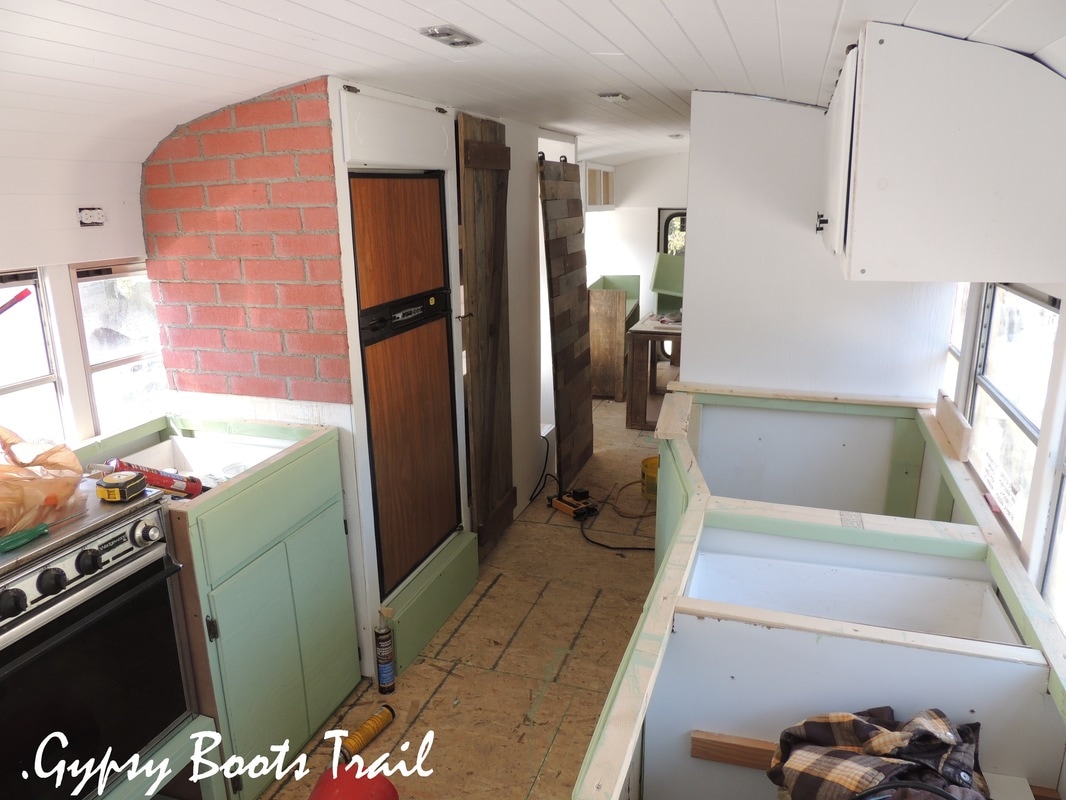
Who says you can't have a tiny bus house AND a trendy brick wall? We certainly don't! I found these amazing Z-Brick tiles in the garage and HAD to use them. Instead of grout my parents also had in hiding, some mortar repair cement in caulking tubes. Together, they made this wall in our kitchen look like a classic brick chimney rising up through the room.
The Pantry

I love watching tiny house shows, but whenever I do I get so upset that people are forgetting about closet space! Where will they put their food and clothes? Tiny living doesn't mean you stop eating, and so I made sure we utilized the space above the wheel well for a pantry. Never did I imagine though it would look this gorgeous!
 Before | 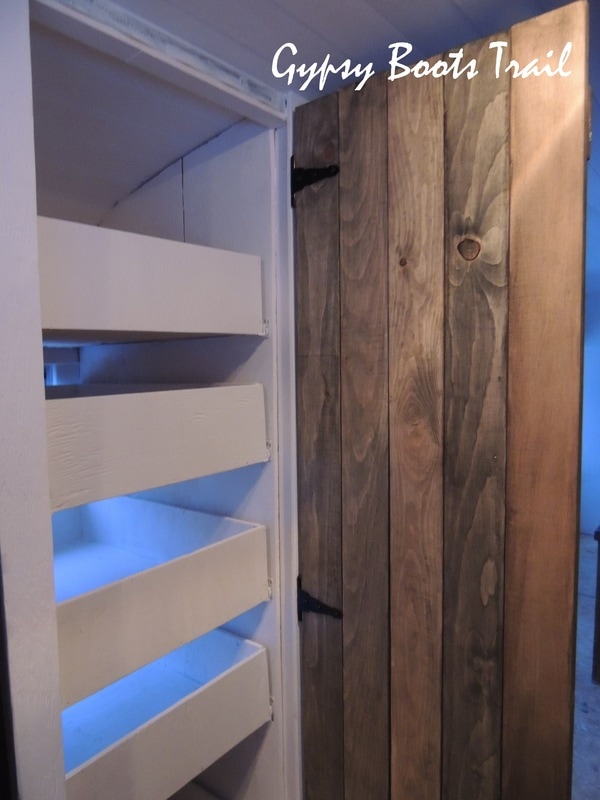 After |
We are using three stains in our bus, all meant to mimic old, weather-worn wood. It may be tiny and it may be mobile, but that doesn't mean it can't be trendy. The stains are Coffee and Slate, semi-transparent wood stain by Behr, and a third we are making at home with a layer of tea and then a coat of steel wool + vinegar (the steel wool needs to soak in the vinegar for at least 36 hours). Together, they all give a really beautiful look and offer some depth to our very white look.
Phil, the master of the stain
The bathroom
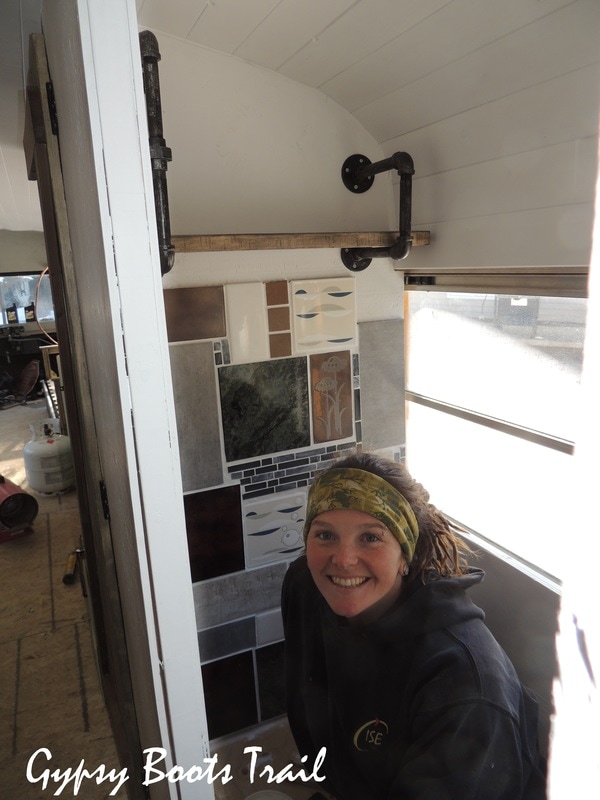
Is a room, only made for a toilet which has no plumbing, still considered a bathroom? We definitely can't call it the WC, I know that much, so bathroom is really the only word I have for this room. As I've mentioned previously, we will have a composting toilet BUT with budgetary constraints we currently cannot afford the toilet of our dreams (fingers crossed, in a few months time we will have it) and so this room will be remaining empty for a little -- that doesn't mean it can't look phenomenal though!
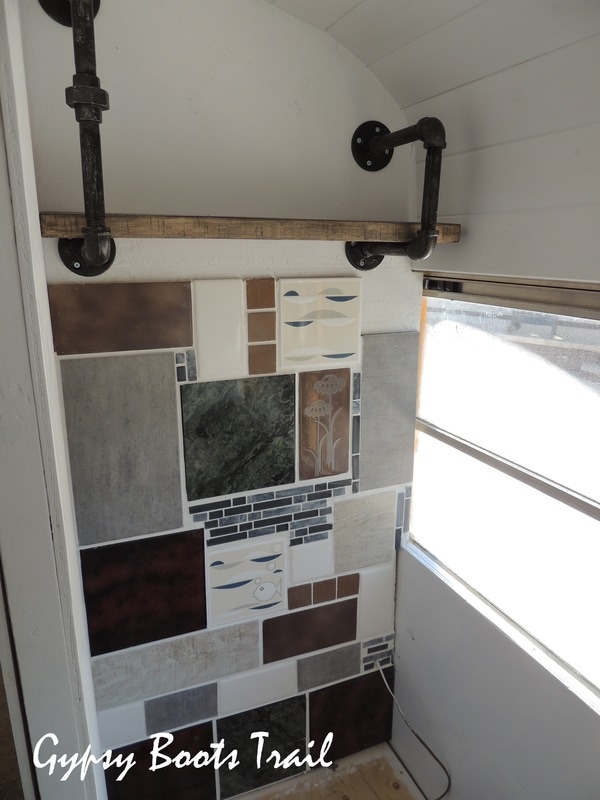
This was the first time I tiled anything and I am happy to have started with such a small area. All of these tiles are recycled in a way because they were all leftovers from tiling jobs from my parents' past. I learnt I'm not too good with a tile cutter and so luckily these all fit together pretty nicely.
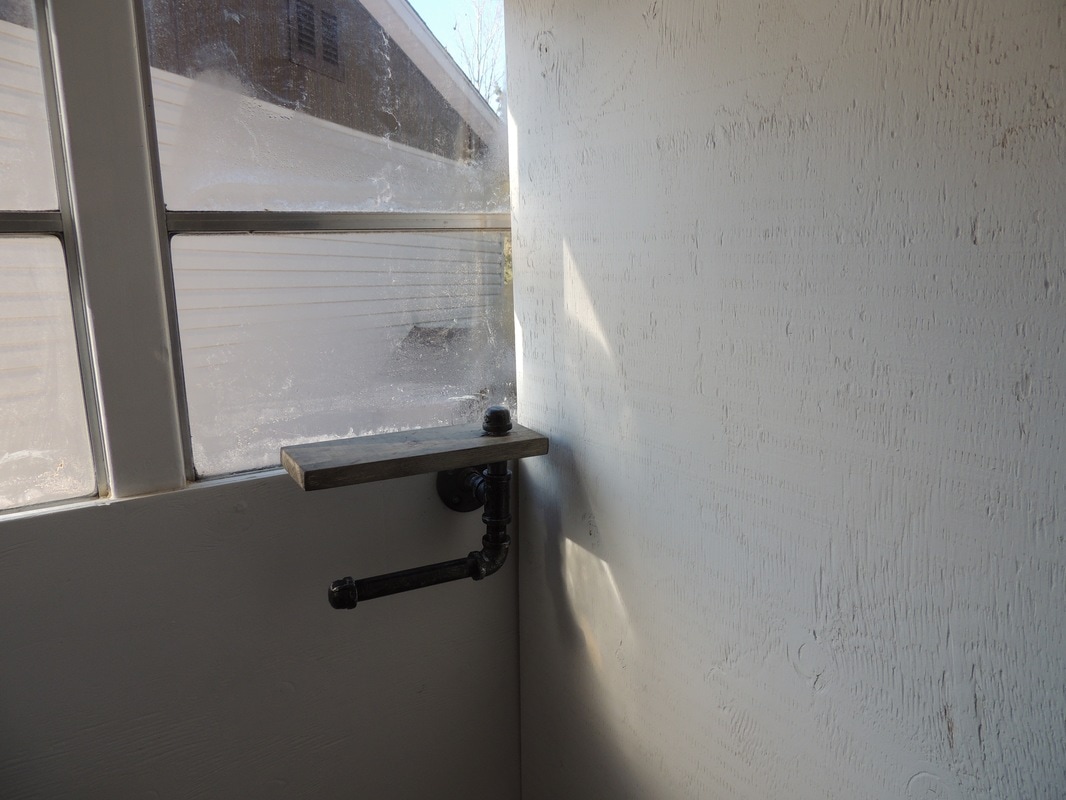 | 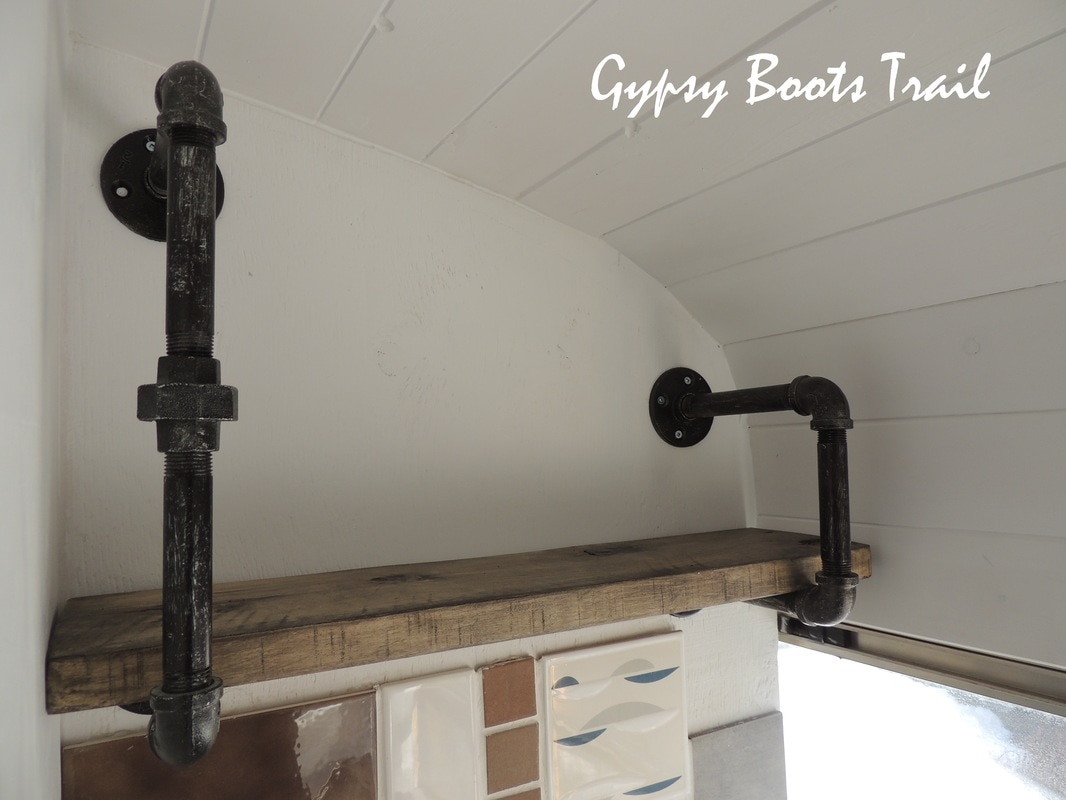 |
The pipe shelf and the toilet paper holder are care of Pinterest and really fun projects though I'll let you know, its cheaper to just buy a toilet paper holder and shelf then all this 1/2" piping, haha.

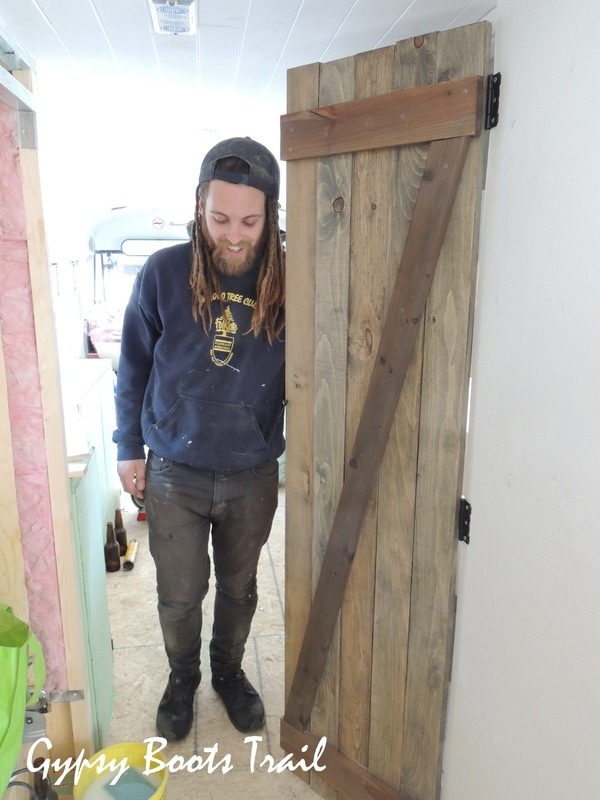
Even the bathroom door needed to be a custom work of art with such strange dimensions. We wanted the barn door look, but couldn't afford the expensive hardware involved ($150 for just the track) so we stained some beautiful pine and pieced together this door. With a little creativity and a garage raid, we came up with a clothes line inspired mechanism we are hoping will provide the same effect.
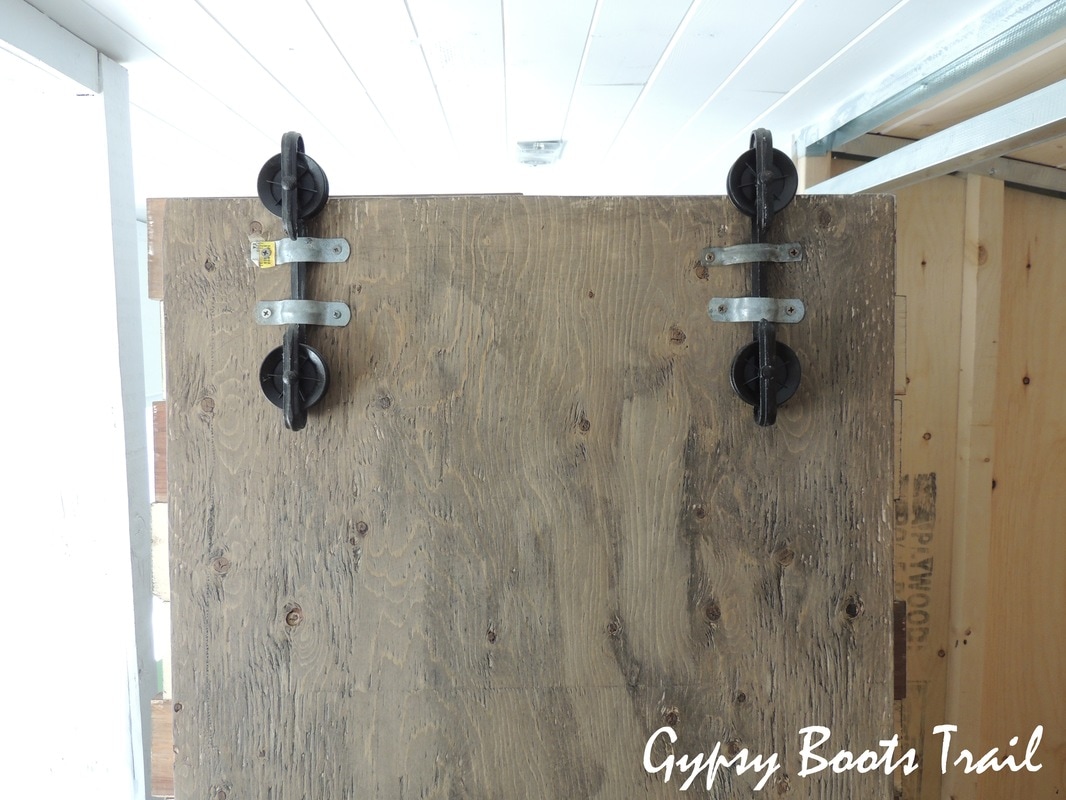
From the front you should only be able to see the top wheels and it will run a thin piece of metal track just like the expensive store bought version.
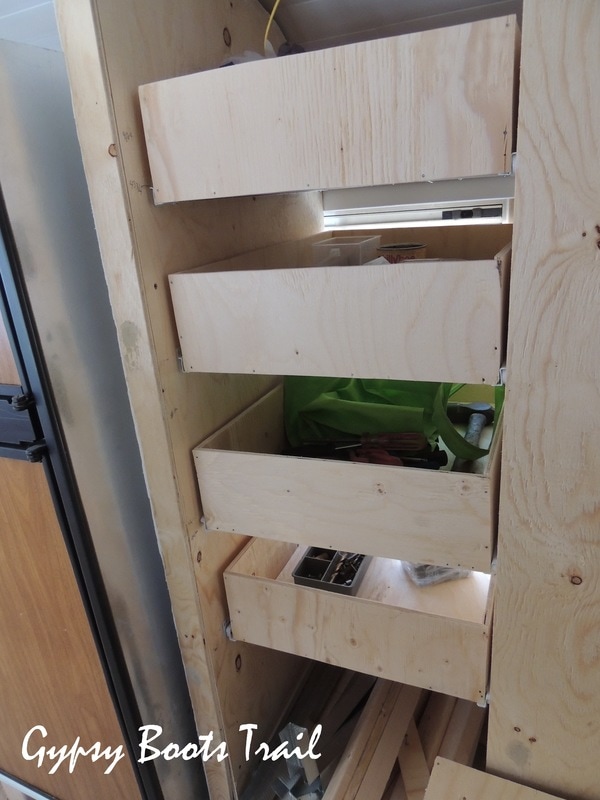
The Dressers
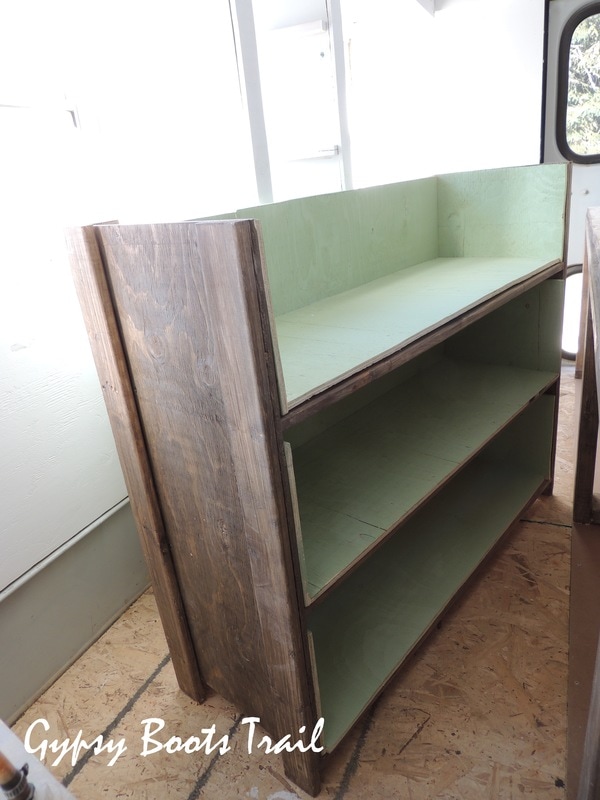
The dressers haven't been completed yet, but they will be matching and on either side of the bookcase in the bedroom. They are built to fit on either side and be only a foot deep. This was a piece of furniture I was hoping to be able to purchase, but our of necessity, I had to make it and I'm thinking so far, so good. I'm planning on having the front of the drawers brown as well and the top a light, more natural stain, on pine to match our countertops (coming soon).
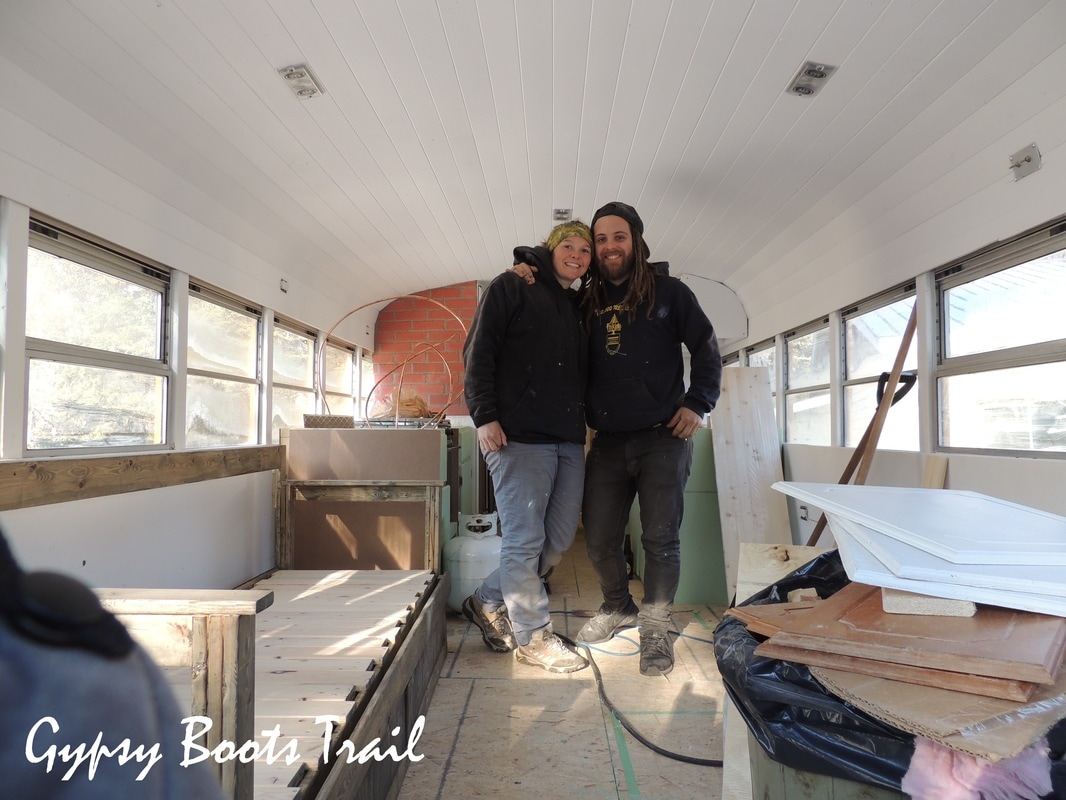
I'm really proud of the work we've been doing and so happy to see this project coming along. I'm also incredibly grateful for all the support we've been getting and the general enthusiasm for this project.
 |  |

 RSS Feed